 Toggle menu


- Made in our Los Angeles shop.
- Ships within 5-7 business days.
- Suitable for canvases or panels up to 3/4" deep. 3/4" deep artwork would be flush with the top/front of the frame. See FAQ for more information about mounting artwork less than 3/4" or thin panels.
- You'd order the same size frame as your artwork. So if you have a 12x12" canvas, you'd order a 12x12" frame. The frame adds about an inch to the canvas/panel, so that a 12x12" frame has outer dimensions approximately 13x13".
- Ships already assembled. Custom sizes may need to ship unassembled. Those orders need to be placed by email. See FAQ for more information about unassembled frames.
- Comes with metal brackets and screws with which to attach your art to the frame.
- For custom sizes, please email us. Prices for custom sizes are not too much higher than those for standard sizes and also ship in the usual 5-7 business days.
You can use our 3/4" rabbet floater frames with thin panels. (More info below). But you may also want to consider our “Panel Frames” . Those are meant specifically for thin panels. The website has diagrams of the moulding’s exact profile and how the artwork goes in the frame.
To attach your panels to these frames you will need either glue or double-sided tape or velcro circles or tape. We do not include any hardware. If you want to use glue, the choice of glue will depend on the material of your panels. Wood glue should be a good choice for most anything, including paper. E6000 Adhesive is another good choice. For foam core and other such lighter materials, we use ATG tape. You may be able to use other kinds of double-sided tape as well. Home Depot and Michael’s both sell some strong and thin, two-sided tapes that will work nicely. Finally, some customers report good results with velcro circles and tape you can buy at craft stores. Some customers are using a product called “Elmers Poster Tack” to attach their panels into the frames. It’s easy to use and totally re-usable.
You may also like our "Strip Frames" with the 5/16” rabbet; they’re here
Now for the floater frames… We have a lot of customers who are putting relatively thin panels in our 1.5” deep floater frames. There are several options; they all boil down to somehow propping the panels up by putting some sort of shim/riser in the back. You simply need to prop up your artwork from the back with some cardboard, or foam-core, or wood. Small triangles in the corners will be enough. Once you have the desired height, then, depending on the method you used and your preference, you can then attach the artwork to the panels with glue, double-sided foam tape, or even one-sided tape that's wide enough to stick both to the back of your artwork and to the inside of the frame. You'll need to get a little creative.
Here is one customer’s inventive solution: http://robinrosenthalart.blogspot.com/p/blog-page_16.html.

We have four kinds of natural wood frames. They are not stained or finished in any way, just lightly sanded.
The Doug Fir is reddish in color, typically grainy, and the warmest, most rustic wood we carry. It's also the most variable in appearance from stick to stick.
The Maple is the lightest and most muted of our woods. It's less grainy than the Doug Fir and also more consistent in appearance from stick to stick. The Maple is a harder wood.
The White Oak is darker than the Maple; the Walnut is darker still. Neither is grainy. Both are quite consistent in appearance from stick to stick.
The Walnut and White Oak look especially good when oiled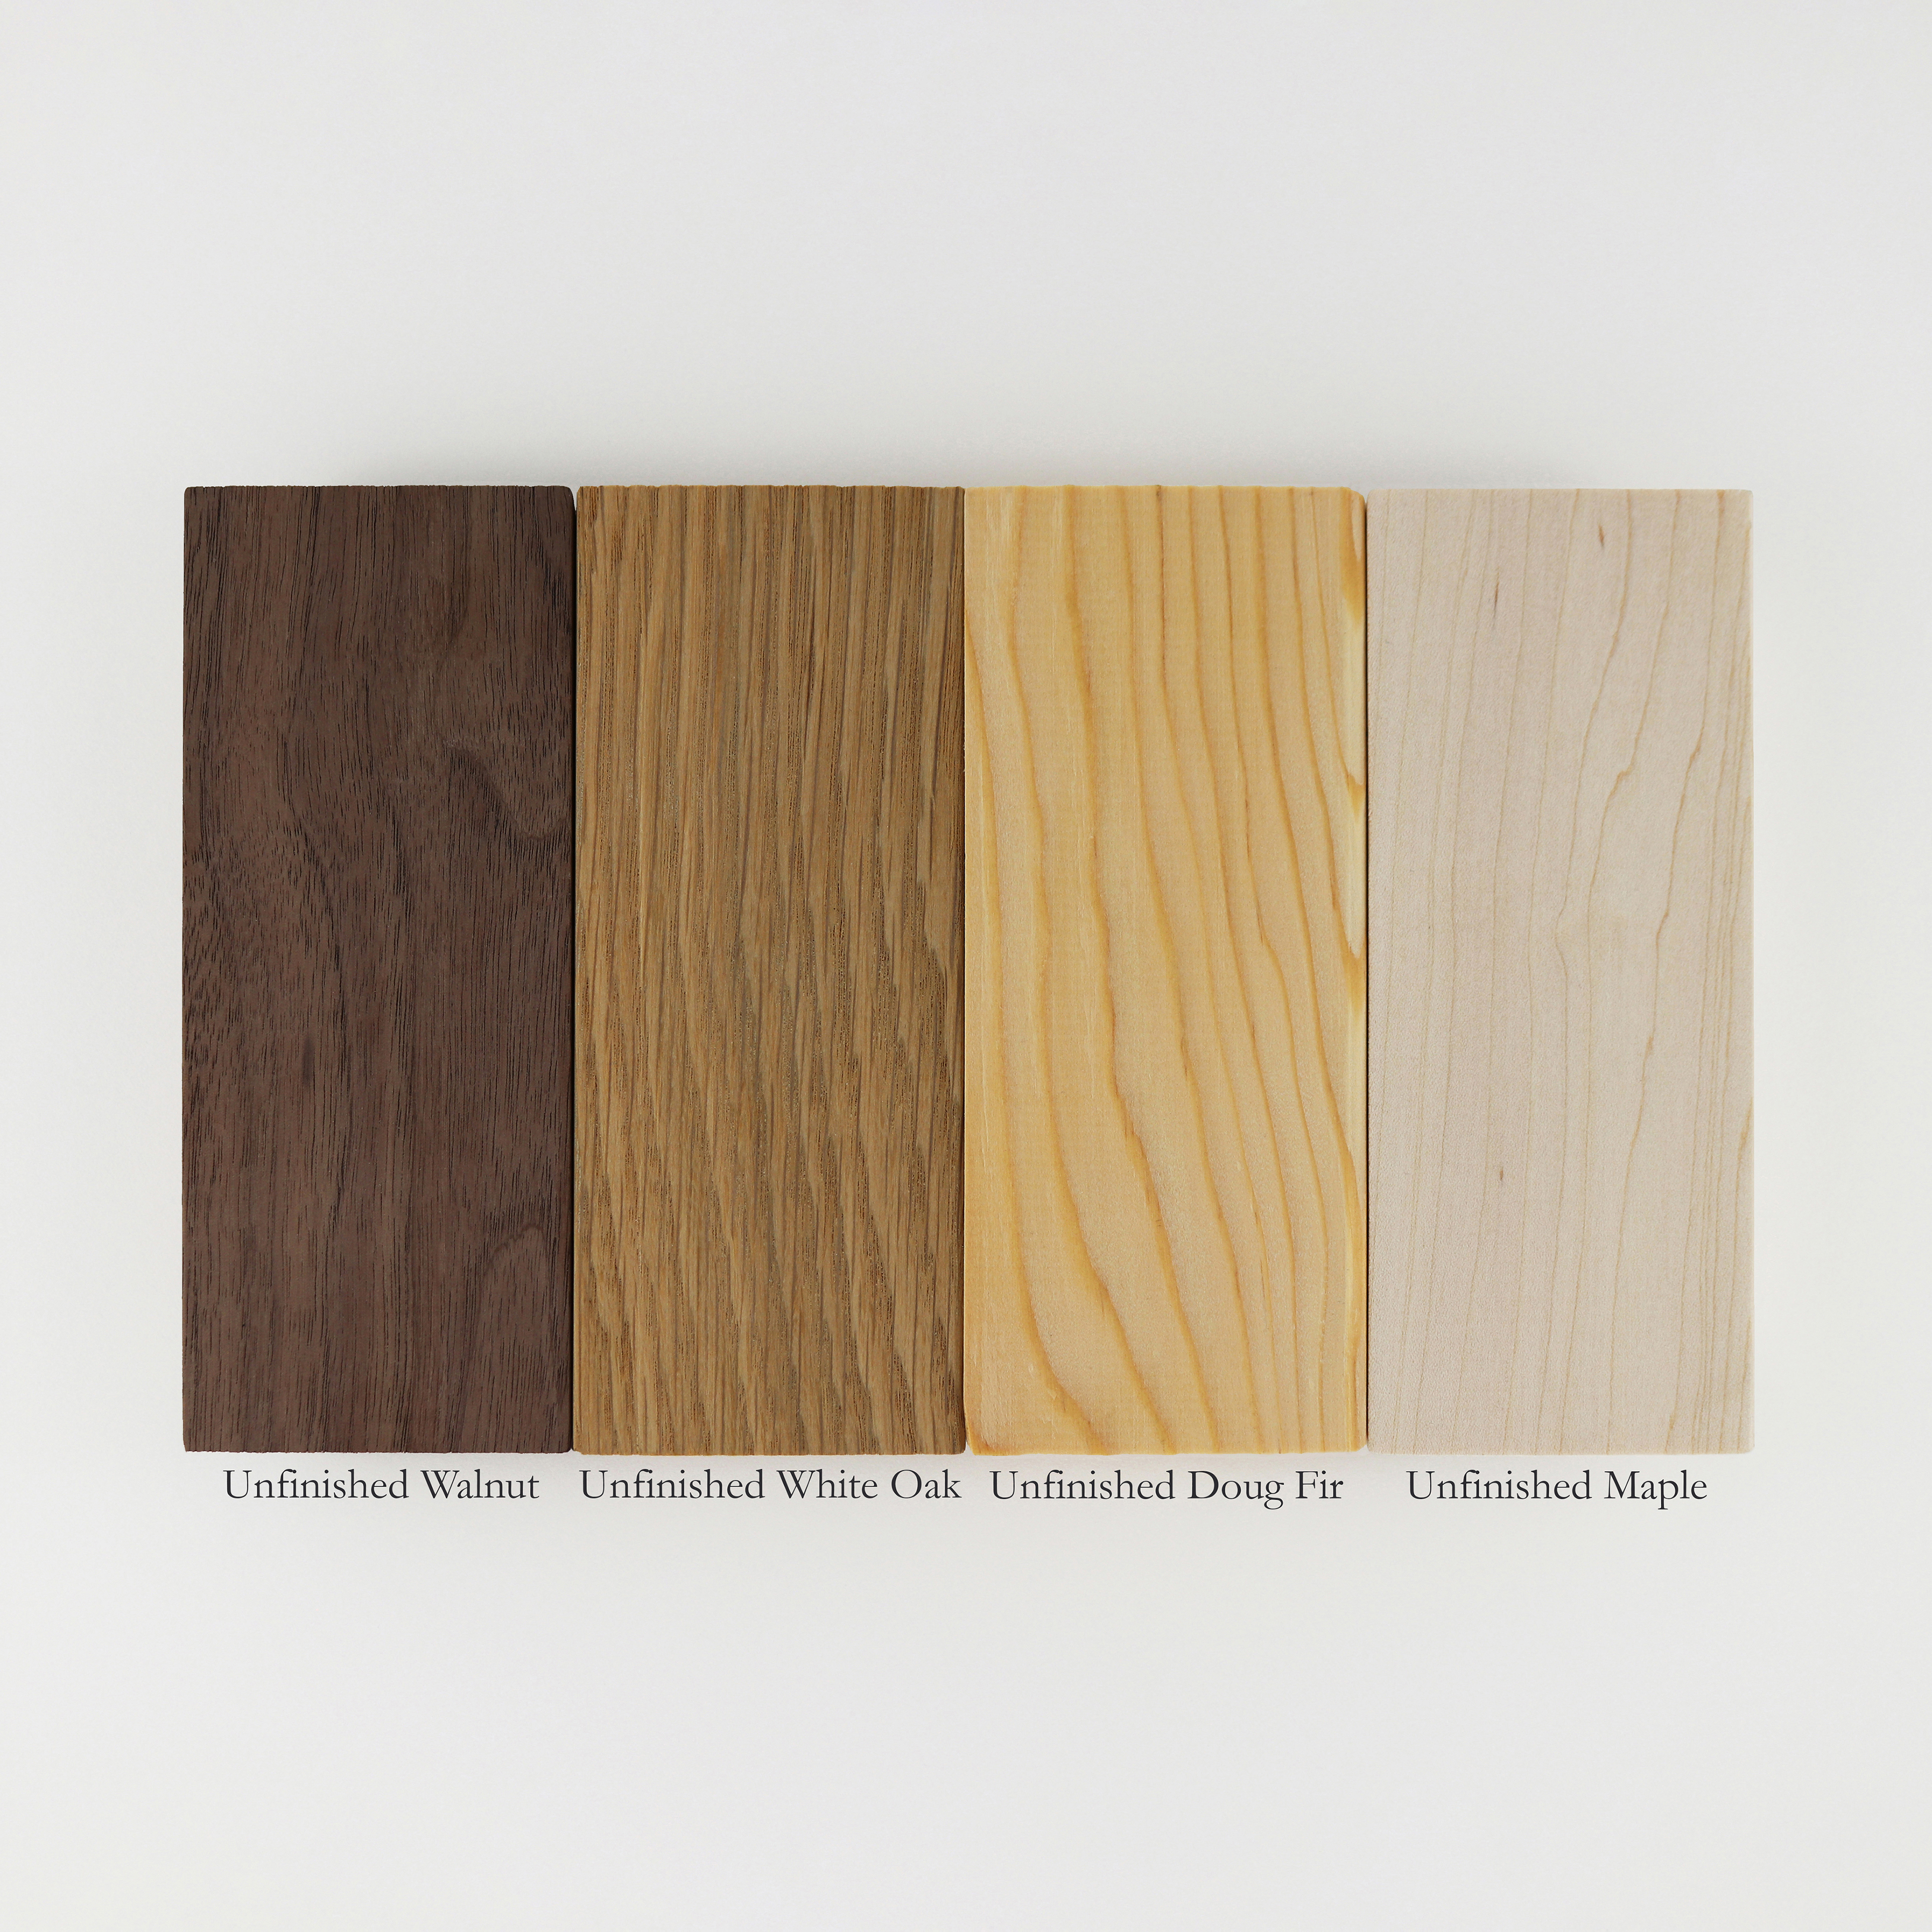
You can use our 3/4" rabbet floater frames with thin panels. (More info below). But you may also want to consider our “Panel Frames” . Those are meant specifically for thin panels. The website has diagrams of the moulding’s exact profile and how the artwork goes in the frame.
To attach your panels to these frames you will need either glue or double-sided tape or velcro circles or tape. We do not include any hardware. If you want to use glue, the choice of glue will depend on the material of your panels. Wood glue should be a good choice for most anything, including paper. E6000 Adhesive is another good choice. For foam core and other such lighter materials, we use ATG tape. You may be able to use other kinds of double-sided tape as well. Home Depot and Michael’s both sell some strong and thin, two-sided tapes that will work nicely. Finally, some customers report good results with velcro circles and tape you can buy at craft stores. Some customers are using a product called “Elmers Poster Tack” to attach their panels into the frames. It’s easy to use and totally re-usable.
You may also like our "Strip Frames" with the 5/16” rabbet; they’re here
Now for the floater frames… We have a lot of customers who are putting relatively thin panels in our 1.5” deep floater frames. There are several options; they all boil down to somehow propping the panels up by putting some sort of shim/riser in the back. You simply need to prop up your artwork from the back with some cardboard, or foam-core, or wood. Small triangles in the corners will be enough. Once you have the desired height, then, depending on the method you used and your preference, you can then attach the artwork to the panels with glue, double-sided foam tape, or even one-sided tape that's wide enough to stick both to the back of your artwork and to the inside of the frame. You'll need to get a little creative.
Here is one customer’s inventive solution: http://robinrosenthalart.blogspot.com/p/blog-page_16.html.
We have four kinds of natural wood frames. They are not stained or finished in any way, just lightly sanded.
The Doug Fir is reddish in color, typically grainy, and the warmest, most rustic wood we carry. It's also the most variable in appearance from stick to stick.
The Maple is the lightest and most muted of our woods. It's less grainy than the Doug Fir and also more consistent in appearance from stick to stick. The Maple is a harder wood.
The White Oak is darker than the Maple; the Walnut is darker still. Neither is grainy. Both are quite consistent in appearance from stick to stick.
The Walnut and White Oak look especially good when oiled


